Explore how to manage your subscription-based billing, invoicing, and customer base development.
This article covers:
Activating the subscription option
- Activate the Subscription product
- Click Settings → CRM → Subscription and click the Activate toggle:
- The Subscription sub-tab now displays under the Sales & CRM tab:
Subscription settings
Default settings
-
(1) Order interval
Select how often orders should be created -
(2) Period length
Select the subscription length (how long should orders be created for) -
(3) Default stage
Which order stage should subscriptions be added to
Show subscription period in orders
Choose when and where the subscription period appears in order fields:
-
No field
Show no start or end dates -
On order
Show start and end dates for the entire order -
On every order row
Show start and end dates for every row in the order
You may need to create custom fields for the subscription date dropdowns:
Card customer
Set the stage that subscriptions should be created for customers. This helps your ARR/MRR reporting accuracy (and is why users can't edit these stages).
You can click the toggle to allow administrators to edit the subscriptions:
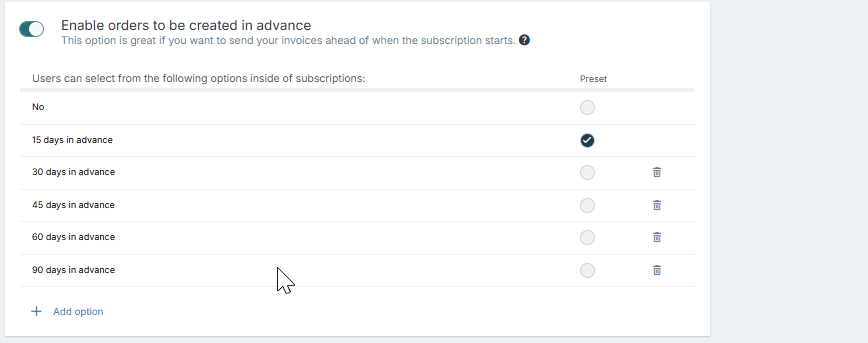
Enable orders to be created in advance
You can have new orders be created and invoices sent ahead of time).
You have a list of default options – click Add option to set a custom number of days.
Deleting an option simply removes it from this list of options. It won't affect subscription that already are using the option:
Notice period
Set how far in advance the customer has to give notice for cancelling the subscription. Select one of the default options or click Add option to add your own:
Deleting an option simply removes it from this list of options. It won't affect subscription that already are using the option:
Credit order
Click the toggle to allow changing of subscription values and create credit orders to make up the differences: